Dutch Aquascape: Important Facts And Maintenance
A Dutch aquascape is a planted aquarium design that arranges many different aquatic plants in dense, terraced rows, making the plants the main feature rather than rocks or driftwood. It started in the Netherlands in the 1930s and grew into a competitive art form.
The style relies on contrasting leaf colors, textures, and heights, and on “plant streets,” which are neat bands of different species running from the foreground to the back glass. A Dutch aquascape usually has little or no hardscape.
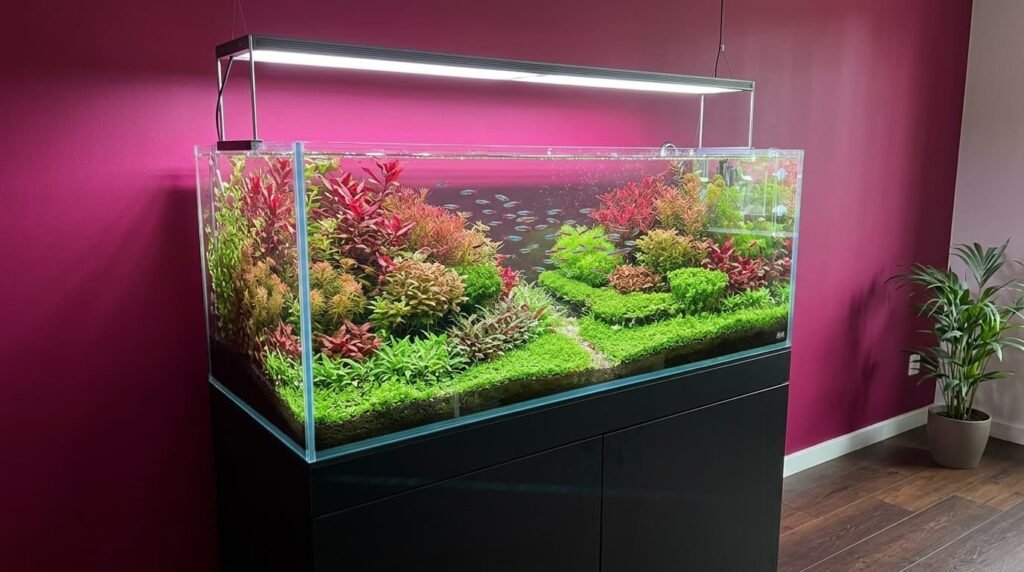
The look comes from careful plant selection, regular trimming, and stable water chemistry, nutrients, and light that keep the plants growing at a steady pace.
If you want a planted aquarium that looks like an underwater flower garden, start with the Dutch aquascape. It rewards patience, planning, and consistent care more than it rewards expensive gear.
Most beginners go wrong by buying plants they like individually and not thinking about how the colors, leaf shapes, and growth rates will sit next to each other.
Table of Contents
Pre-planning Layout
Always think about where and why you’re placing each plant. Your tank should read as a series of terraces, with the lowest plants at the front and the tallest at the back.
Each band should be a single species or a small group of species that look alike, so the eye can pick out the pattern. Aim for plant streets that are wide enough to see clearly but narrow enough that you can fit six to ten of them across the tank.
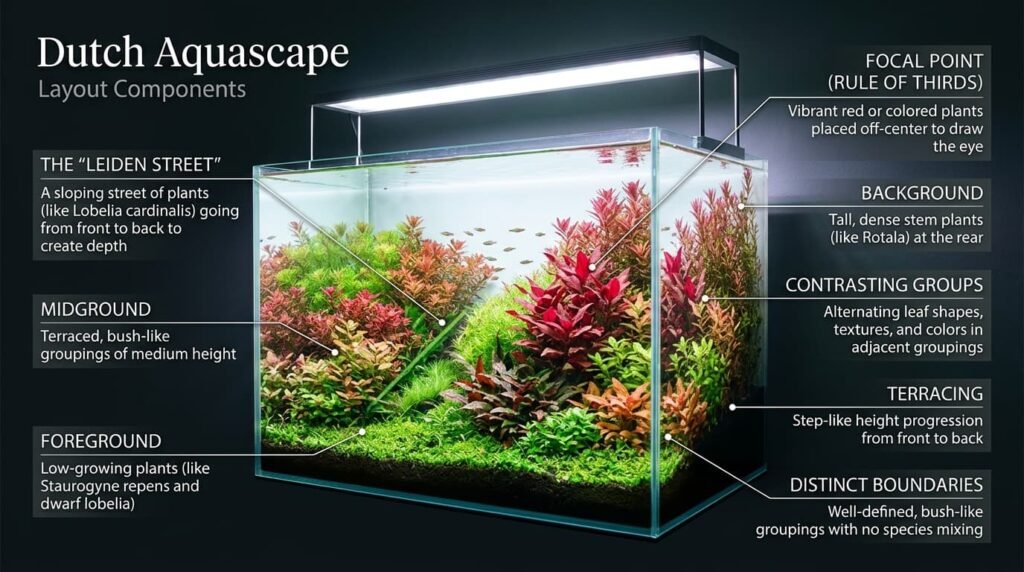
Contrast does most of the work here. Put a fine, feathery plant next to one with broad, round leaves. Put a red or orange plant next to a bright green one.
If two neighboring streets look too similar, they blur together, and the whole scape turns into one green wall. Sketch the layout on paper first. It costs nothing, and it saves you from replanting a tank full of roots later.
Appropriate Plants
Stem plants are the backbone of a Dutch aquascape because they grow quickly, fill in fast, and respond well to trimming. Rotala, Ludwigia, Hygrophila, and Cabomba are common choices, and red species like Alternanthera give you the strong color breaks the style depends on.
In the foreground, low carpeting plants keep the front terrace tidy without blocking the view of everything behind them.
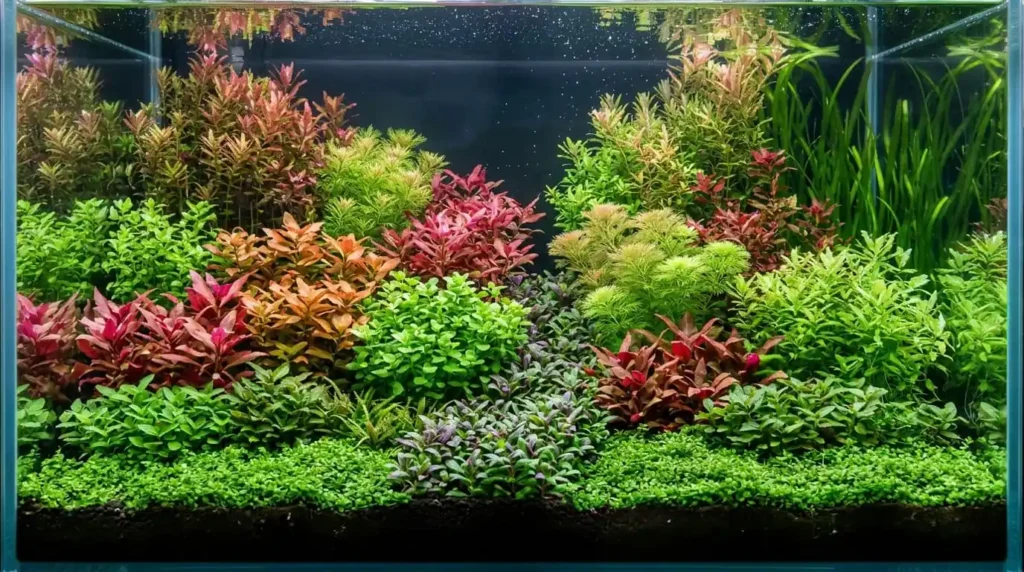
Pay attention to growth rates. A fast-growing plant planted beside a slow one will shade it out within weeks, so keep similar growers together or plan to trim the fast ones more often.
Plant stems in small bunches with a little spacing, and keep them tight enough to fill out quickly. You can always thin them later, but filling a gap takes weeks.
Light, CO2, and Nutrients
This is where a Dutch aquascape is won or lost. Dense plant growth uses up resources quickly, and research on submerged plants shows how tightly growth is tied to what is in the water.
One study of submerged plants and water chemistry found that plant growth drained dissolved inorganic carbon and some minerals from the water, and that even added CO2 did not always keep up with demand.
It also found that nitrogen and phosphorus came mainly through the roots, while potassium was taken up through the leaves. In practice, that means you need a nutrient-rich substrate for the roots and a liquid fertilizer for the water column.
Carbon and nitrogen also work together. A laboratory experiment on CO2 and nitrate in submerged plants showed that growth rose in every species tested when both CO2 and nitrogen increased, and that the two factors affected tissue chemistry, chlorophyll and starch in combination.
Pushing CO2 without feeding the plants enough nitrogen, or the other way around, wastes your effort. Another greenhouse study on Vallisneria spinulosa found that elevated CO2 increased growth and boosted accumulation of carbon, nitrogen, and phosphorus across the plant’s life cycle. Dense scapes behave the same way.
For a practical routine, use a strong, even light over the whole tank, inject CO2 steadily during the lighting period, and dose fertilizer on a schedule instead of by guesswork.
Change your lights, CO2, and dosing one at a time, and give the tank a week or two to show you the result before you touch anything else. If you change three things at once, you will never know which one caused the algae.
Dutch Aquascape Trimming
Maintenance is not a chore in a Dutch aquascape; it is the design. Stem plants need regular trimming to keep the terraces sharp, and most tanks want a haircut about once a week.
Cut the tops, replant the healthy cuttings, and discard the old lower growth. Done on a steady schedule, this keeps each stream at the height you planned and stops the back row from swallowing the middle.
Pull out dead leaves as soon as you see them, vacuum debris from the substrate, and change a good portion of the water every week. A clean tank with stable parameters grows better and stays clearer than one that gets a big overhaul once a month.
Fish Selection
Small schooling fish like neon tetras, rummy nose tetras, or harlequin rasboras show off the plants without tearing them up, and their movement adds life to the scape.
Avoid fish that dig, uproot, or nibble on plants, because a single destructive species can undo weeks of planting. A few algae-eating shrimp or snails can help with cleanup, but don’t overstock, since extra waste feeds the algae you are trying to prevent.
Start Small, Then Refine
Finally, so you don’t bite off more than you can chew, start with a medium tank instead of an enormous one. A tank around 60 cm to 90 cm wide is large enough to show off several plant streets but small enough to trim in a few minutes.
Get the layout, light, CO2, and fertilizer working first, and add rarer or more demanding plants once you trust your routine. A Dutch aquascape looks best when it has had a few months to mature, so be patient with the early weeks and keep trimming.
Also read:
- The Ultimate Aquascaping Toolkit for a Planted Tank
- Reef Tank Aquascape: How to Place Rock and Coral
- The Betta Aquascape: Layout Rules & How to Set Up
- The Dragon Stone Aquascape: Layout Rules & How to Set Up
- The Iwagumi Aquascape: Layout Rules & How to Set Up
- Seiryu Stone Aquascape: Important Facts and Maintenance
- 5 Most Attractive 20 Gallon Long Aquascape Ideas